This idea is taken from Disney Family Fun magazine craft section of their December/January 2012 edition.
 Supplies:
- Cardboard Box – Big enough for the size of tree you want. Tree shown in image is 12″ wide at base and 13″ tall to tip of tree.
- Hot Glue or Regular Glue
- Acrylic Paint, preferable green and/or red. Tree shown has a red/green pattern.
- Paint Brush
- Wire or string
- Paper or card stock for ornaments
- Buttons or big beads to put on wire/string garland
- Ruler
- Tissue Paper – at least one sheet to cover circle bottom of tree
- Scissors or adult box cutter knife (for use by adult only)

Getting Started
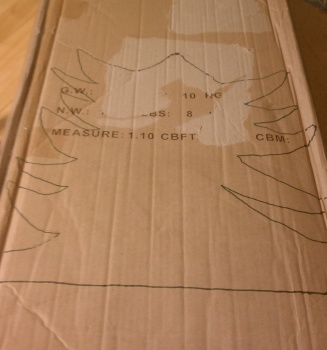
First you will want to determine how big you wish to have the tree, instructions are based on a 13″ x 12″ tree, so scale yours correctly based on desired size. Measure out the base on a cardboard shipping box to 12″ for the base of the tree. Mark both sides or draw a straight line across.
Next, measure up 13″ and place a dot or line for a guide on tree height. Draw a tree with angles to ensure ornaments and garland can hang properly from tree.

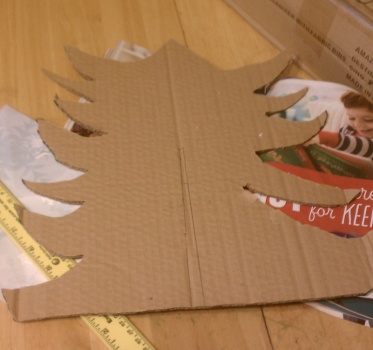
Cut out your first part of the cardboard tree. Place this first tree cutout onto another cardboard box and trace it and cut out a second part of the cardboard tree.

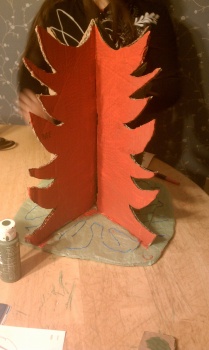
Once you have both tree cutouts ready. Start to measure to cut a notch in the top of one tree and the bottom of the other tree, this will allow you to interlock the two cardboard cutouts. The measurements we used were 1/2″ across and 7″ give or take a little upwards. The notches may need to be adjusted to ensure your tree sites flat on the surface.

You will want to put hot glue into the notches when your notches are in perfect order to ensure your tree is sturdy. Next create a circle bottom to the size of your liking. Best way to determine size of the circle bottom is to trace around the bottom of your tree in a circle motion. Cut the circle out and use tissue paper if you wish to cover the cardboard color, we used green tissue paper.

Last but not least you will want to hot glue the tree to this circle bottom to ensure it stays on steady. While you wait for the glue to dry, you can paint the tree carefully in the color of your choice.
The final steps include creating your own garland and paper ornaments. For the ornaments you will need to trace a circle onto a piece of paper for however many ornaments you wish to hang from the cardboard tree. Decorate each ornament to your liking and use an ornament hook or paperclip to attach to the tree edges.

The garland can be a string with buttons or beads attached via a tied knot every few inches and draped over the cardboard tree as one would drape over a regular Christmas tree.
Have fun crafting with the kids & have a happy holiday season!


Great use for all those extra boxes this time of year.